How to Import IMS ASCII Data Into ArcGIS
This article describes the process for importing IMS ASCII data, in 1, 4, and 24km resolutions into ArcGIS using ArcMap v10.5.
The data product is called IMS Daily Northern Hemisphere Snow and Ice Analysis at 1 km, 4 km, and 24 km Resolutions (G02156). Note that there are both packed and unpacked versions of the 24km resolution data.
To import unpacked data
- Download this IMS_24km_Unpacked_to_Packed.txt file containing Python code.
- Change the extension to .py and use the script to convert to packed form ready for ArcGIS and then follow steps 5-8 below.
- The steps to follow require the use of the command line “Sed” utility included in Unix-like environments. If you are running a Windows machine, you can install “Sed for Windows” through SourceForge: http://gnuwin32.sourceforge.net/packages/sed.htm
To import packed data
- Unzip the *.asc.gz file you downloaded from our FTP
- In your choice of text editor, open the *.asc file and strip the header information such that only the numerical data array remains. Ensure there is no white space or a blank line at the start of the document. Save your new data array as *_stripped.asc.
- Open a command line/terminal window in the same directory as your header-stripped data array, and issue the follow sed command to insert white space between each integer in the array:
sed 's/.\{1\}/& /g' filename_stripped.asc > newfilename.asc - Open your newfilename.asc and add header information to the first five lines of the file. The header information will be dependent on file resolution you are working with (See Table 4 of the g02156 user guide):
- For 24km resolution data, in packed form
NCOLS 1024
NROWS 1024
XLLCORNER -12126597.0
YLLCORNER -12126480.0
CELLSIZE 23684.977
- For 04km resolution data:
NCOLS 6144
NROWS 6144
XLLCORNER -12288000.0
YLLCORNER -12288000.0
CELLSIZE 4000.0
- For 01km resolution data:
NCOLS 24576
NROWS 24576
XLLCORNER -12288000.0
YLLCORNER -12288000.0
CELLSIZE 1000.0
Here is an example how the (packed) 24km .asc file should look after completing steps 1-4.
NCOLS 1024
NROWS 1024
XLLCORNER -12126597.0
YLLCORNER -12126480.0
CELLSIZE 23684.997
0 0 0 0 0 0 0 0 0 0 0 0 0 0 0 0 0 0 0 0 0 0...[1024]
0
0
0
0
.
.
.
[1024]
Now, save your file as you prefer.
- For 24km resolution data, in packed form
- In the ArcToolbox, you can make use of the ArcToolbox -> Conversion Tools -> ToRaster -> ASCII to Raster tool. We recommend setting the output raster as a .tif extension. If the tool fails, open the.asc file again to make sure there is no white space at the end of the file.
- The data should now be displayed in the Map pane. However, as the documentation states in a special note just above Table 4, the data are written to the file in reverse order such that the raster is inverted. Use the ArcToolbox->Data Management Tools -> Projections and Transformations -> Raster ->Flip.
- Lastly, assign the projection. ArcToolbox-> Data Management Tools -> Projections and Transformations -> Raster -> Project Raster
- For 24km data:
- Output Coordinate System: Add Coordinate System -> New -> Projected Coordinate System
- General -> Name: 'IMS 24km Coordinate System'
- Projected > Name (dropdown): Polar_Stereographic_Variant_B
- Set Standard Parallel = 60 and Longitude of Origin = -80
- Geographic Coordinate System -> "Change..."
- "Add Coordinate System:" > New Geographic Coordinate System
- Name: 'IMS_24km_Geographic Coordinate System'
- Set Datum to <custom> and Spheroid to <custom>
- Set Smi major and Semi minor axes to: 6371200
- Inverse flattening = 0
- Apply all changes
- For 01km and 04km data:
- Output Coordinate System: Add Coordinate System -> New -> Projected Coordinate System
- General -> Name: 'IMS xxkm Coordinate System'
- Name: Polar_Stereographic_Variant_B
- Set Standard Parallel = 60 and Longitude of Origin = -80
- For 24km data:
- Done! Test your data against a known continent / coastaline shapefile for placement.
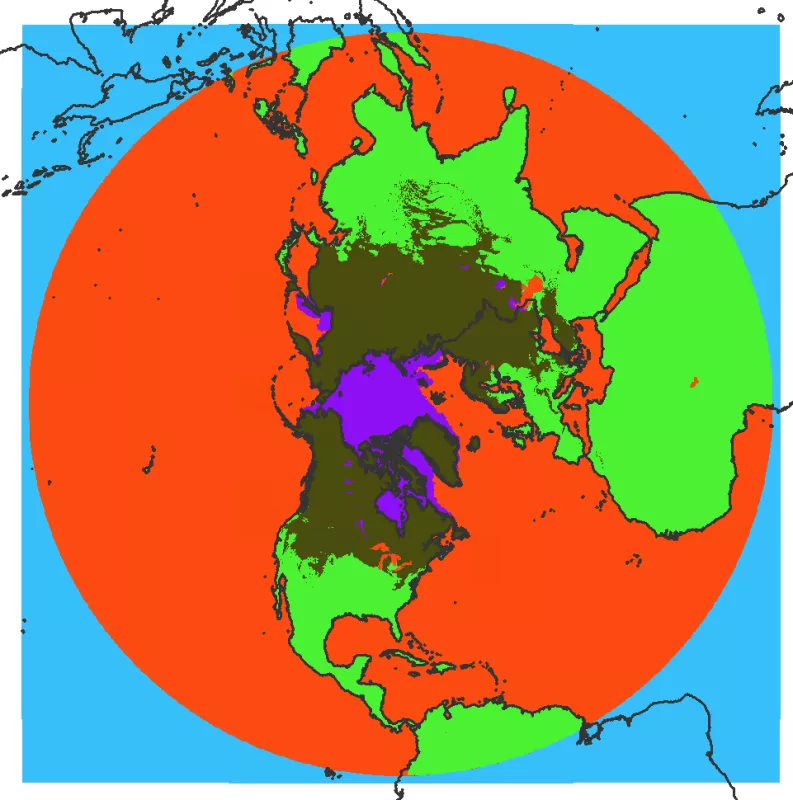
Example Output from the packed 24km data
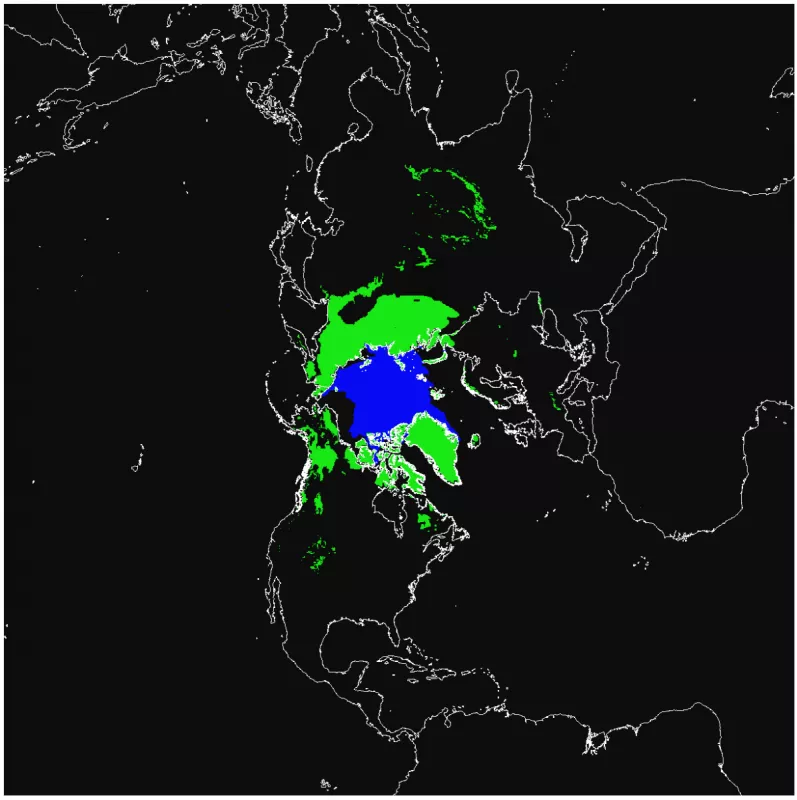
Example output from the unpacked to packed 24km conversion
Last Updated January 2018

