How to find LVIS data products
The LVIS (Land, Vegetation, and Ice Sensor) laser altimetry facility delivers surface topography and 3D structure data from various geographic regions. The NASA homepage for LVIS provides an overview of the coverage of these campaigns, each with a set of KMZ files for easy discovery of the available data. These KMZ files contain flight trajectories, height information previews, and browsable imagery. The filename parameters from these imagery files can be used as keywords for searching science products on the Earthdata Search platform.
This guide explains how to find LVIS science products in Earthdata Search using filenames from the exploratory tools and KMZ files available on the NASA LVIS campaigns webpage.
Part 1: Finding your region
This section outlines how to explore flight trajectories and preview data on the NASA LVIS page to determine the available data for a particular geographic study area.
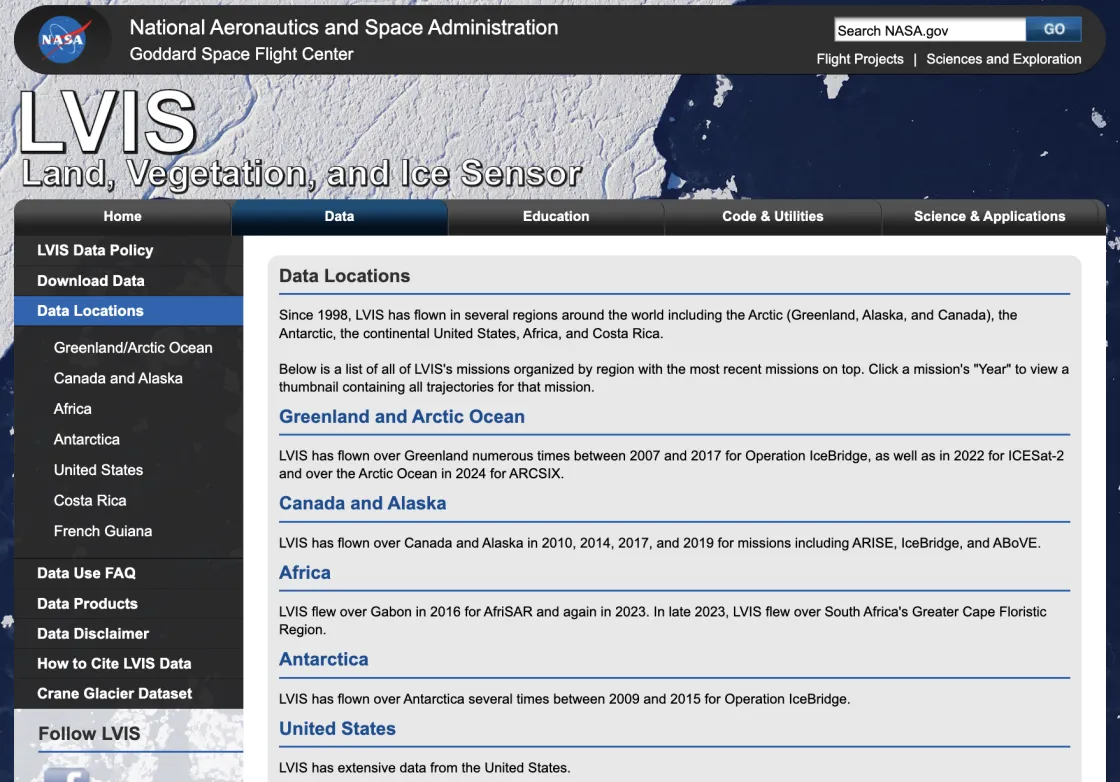
- Navigate to the NASA LVIS homepage: https://lvis.gsfc.nasa.gov/Home/index.html.
- Click on Data Locations in the menu on the left.
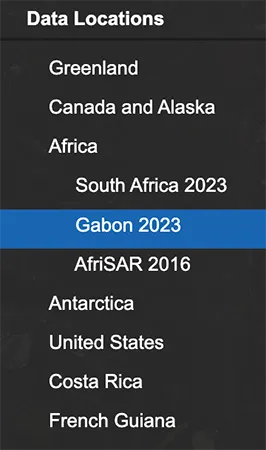
Navigate to your campaign of interest and select it ( e.g. Africa > Gabon 2023)
- Scroll down to the Data Products section. You’ll find the main science products are available at the NSIDC DAAC and through NASA’s Earthdata Search Client, while the KMZ files (including preview files and flight trajectories) are available on the LVIS mission page.
- Scroll to the map interface and campaign flights in the table below it.
- Check geographic coverage by toggling the flight lines using the "View" column checkboxes.
Each flight offers different KMZ files for download:
- GPS flight trajectory: Matches the flight lines shown on the map
- Two L2 Gridded KMZs: ZG (bare ground) and RH95 (relative height)
- Photo KMZs: Browsable collection of reduced geolocated images with timestamps and other information
- Download all the KMZ files for your area of interest using the blue links in the table. The filenames of the browse images attached to the Photo KMZs will guide your search for the geolocated waveforms, elevation products, and imagery within NASA's Earthdata Search Client.
Part 2: Visualizing LVIS KMZs in Google Earth Pro for Desktop
This section explains how to use Google Earth Pro for desktop to browse available data in the KMZ files and find temporal coverage information in the filenames of the browse images. You can access mission data, instrument details, region information, and flight timing by opening the Photo KMZs in Google Earth Pro. Download the software here: https://www.google.com/earth/about/versions/#earth-pro
- Load the KMZ files into Google Earth Pro using File > Open… > (navigate to your downloaded files). They will appear in your Temporary Places.
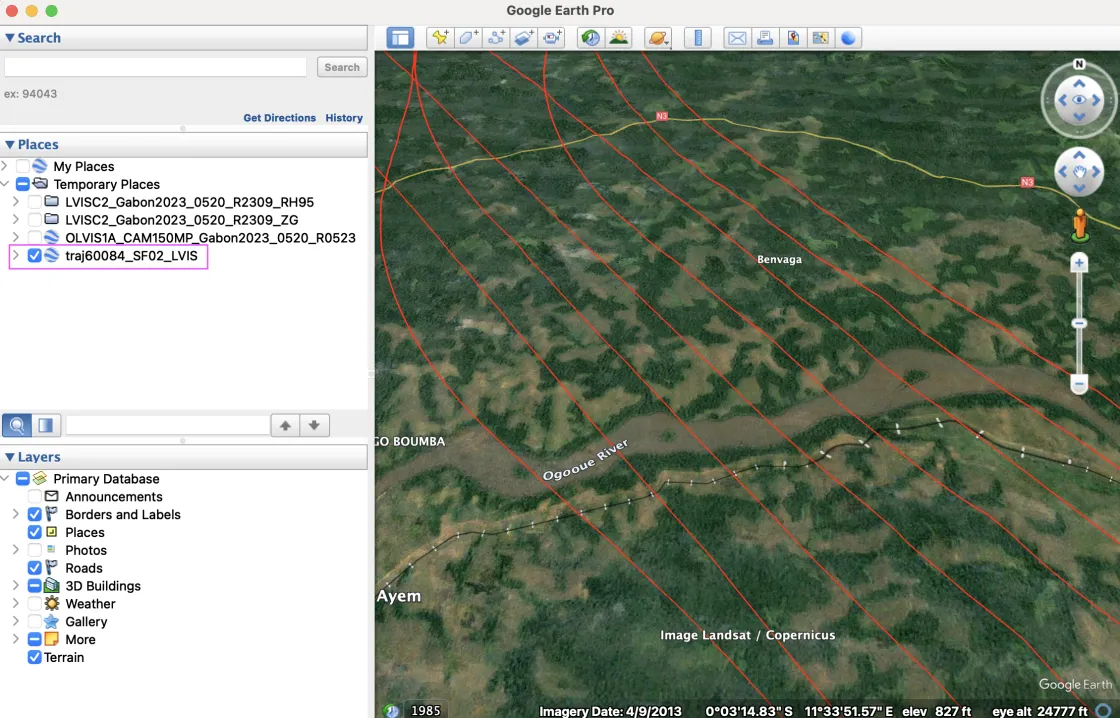
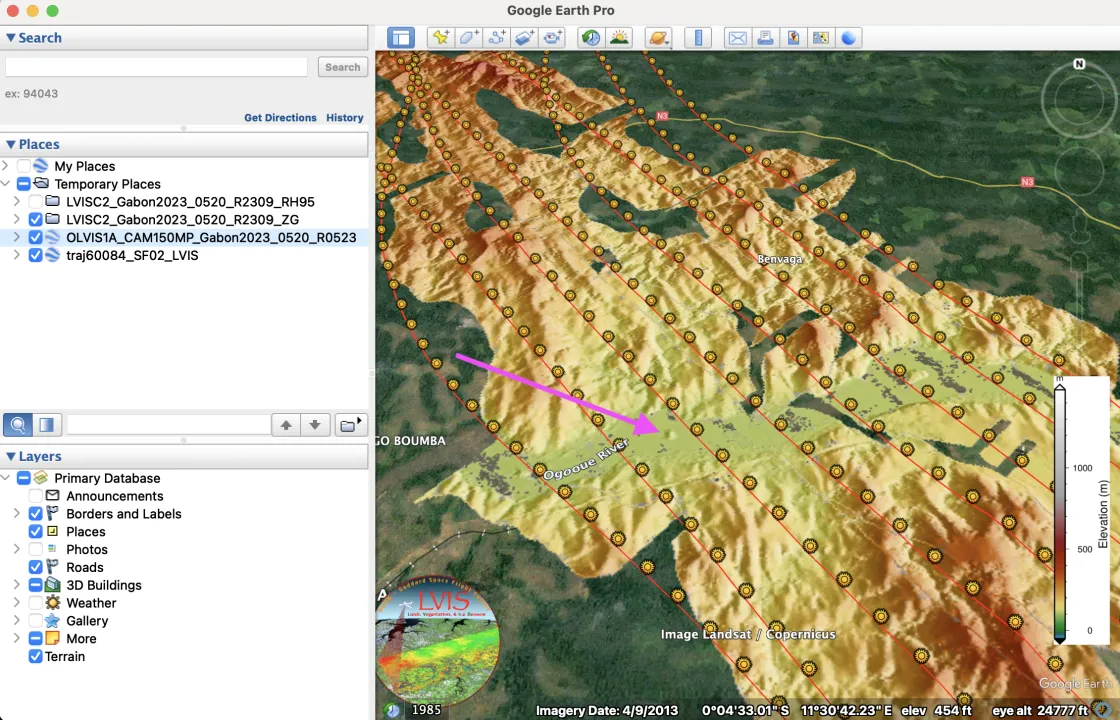
- Toggle on the flight lines and zoom into your area of interest (e.g. the Ogooue River) using the controls on the right side.
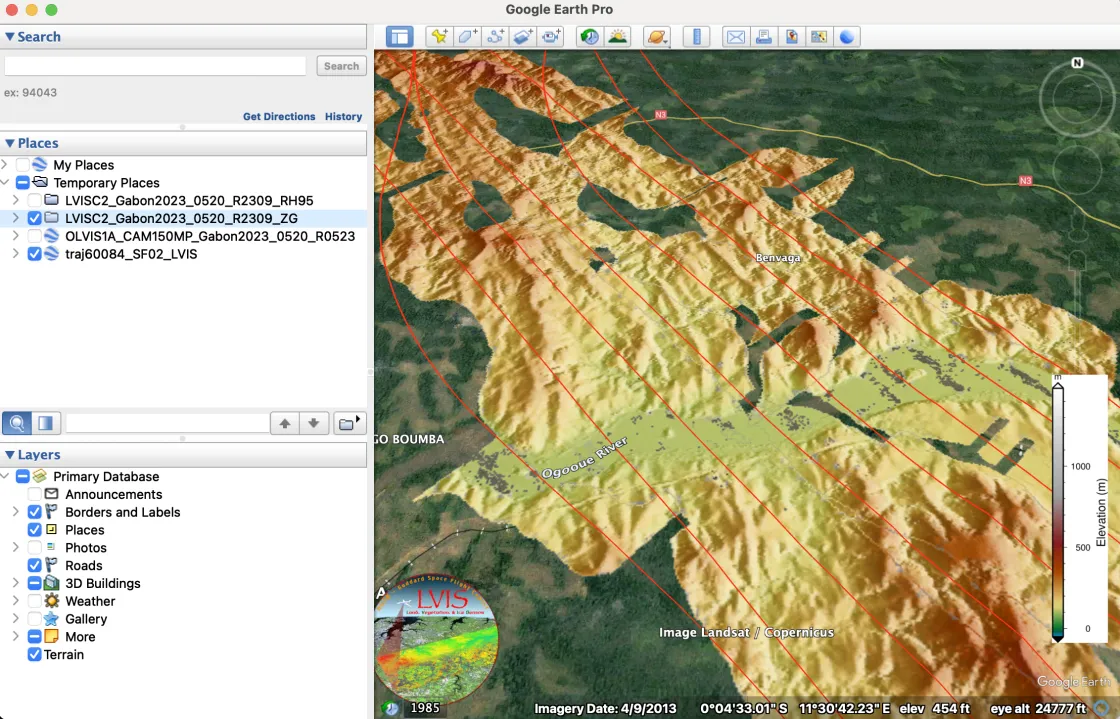
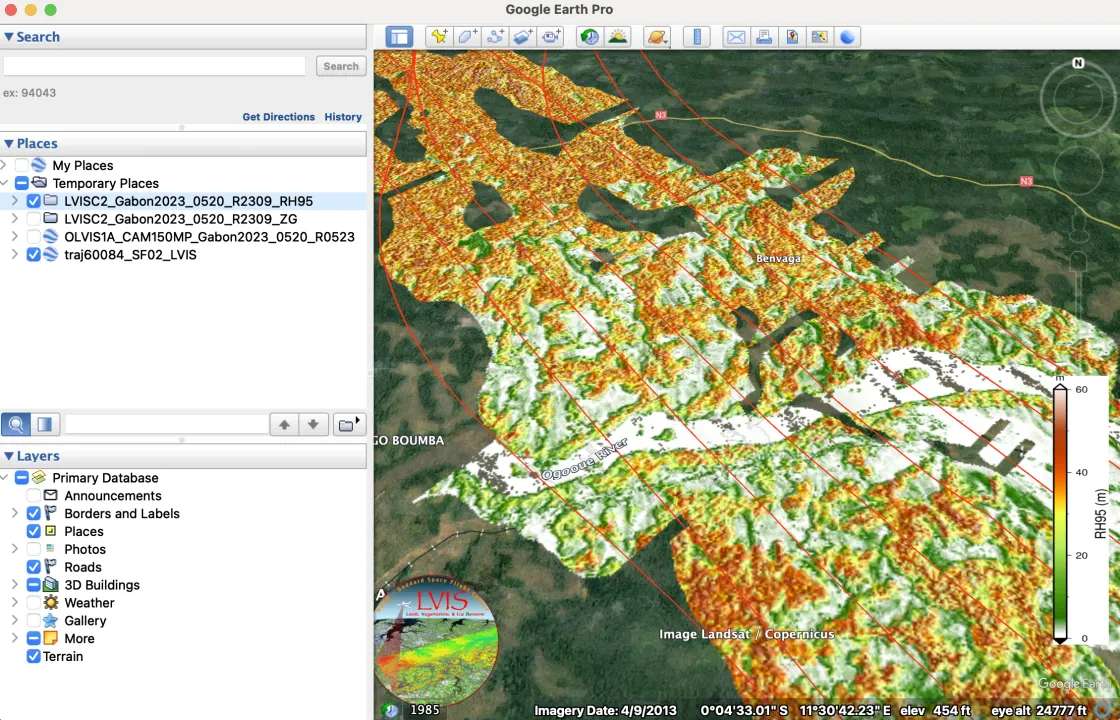
- The L2 Gridded KMZs provide elevation and height data previews: ZG shows bare ground height (DEM) and RH95 shows canopy heights (representing the 95th percentile of energy return height relative to the ground) as shown in these examples:
- Turn on the OLVIS1A layer to display photo point locations along the flight trajectories.
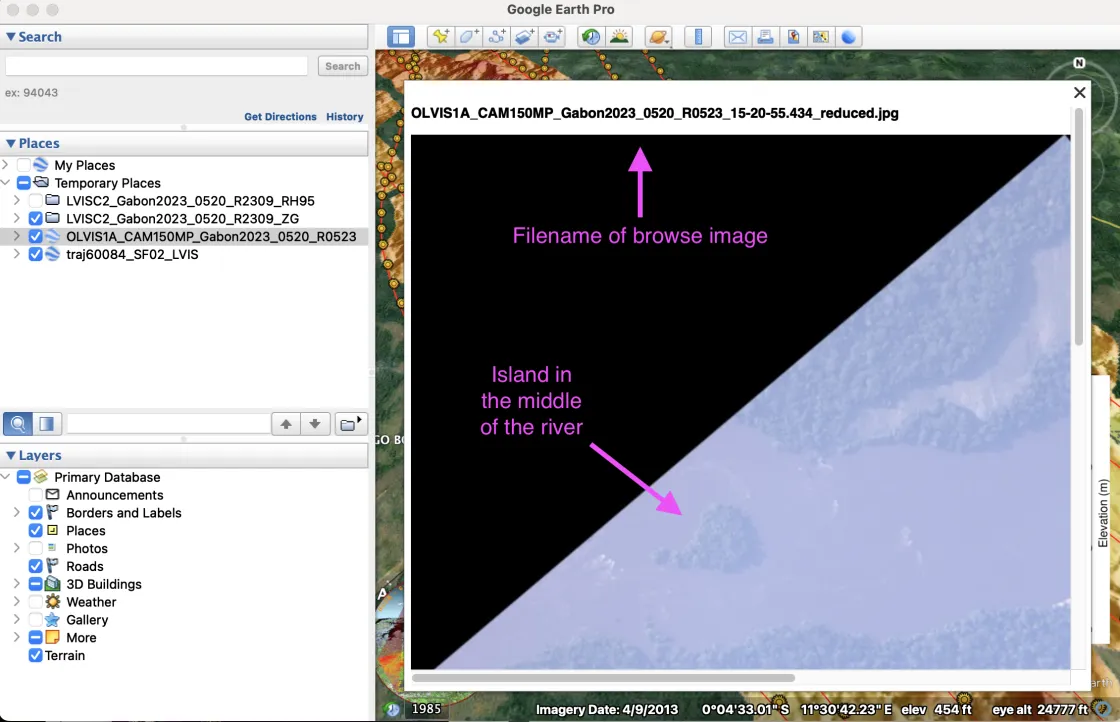
- Click individual photo point indicators to view their associated reduced-resolution browse image and note the image's filename.
- Pan around the browse image to confirm it captures your desired location. Note that the KMZ photos allow you to check for cloudy conditions where science products such as the LVIS waveform and elevation data could be degraded or unavailable.
- Note the filename for searching in NASA's Earthdata Search Client. It starts with a code for the data set and includes information about the location and date of capture.
- Example: OLVIS1A_CAM150MP_Gabon2023_0520_R0523_15-20-55.434_reduced.jpg
- General format: <data set shortname>_<camera name>_<campaign identifier and year>_<month and day of data collection>_<date of data production>_<Hrs-Min-Sec of data collection start>
- For more details about this naming convention, please refer to section 1.2.3 of the OLVIS1A user guide.
Part 3: Finding science products via NASA's Earthdata Search
This section outlines how to use browse image filenames from the previous steps to filter and download LVIS science data in NASA's Earthdata Search.
- Go to https://search.earthdata.nasa.gov
- Log in with your Earthdata Login via the button in the upper right.
- To find the correct collection, where it says, “Type to search for data,” enter the data set shortname of the filename (e.g., OLVIS1A). You can search for any of these five LVIS datasets: LVISF1B, LVISF2, LVISC1B, LVISC2, OLVIS1A:
- You will be brought to a page showing the available collections associated with the shortname you entered. Clicking anywhere on your desired collection will bring you to a file or granule browsing page. Here is the example collection for OLVIS1A hosted on the cloud:
- Select the matching collection to view available granules.
- In the Filter Granules box on the left, set the temporal limits if you need a specific time range. You can also limit your search with the Temporal and Spatial options in the upper left.
- Under Granule ID(s), enter an asterisk followed by the <campaign identifier and year>_<month and day of data collection> portion of your filename, followed by another asterisk. (e.g. *Gabon2023_0520*). The asterisks are wild cards for multiple characters (use a question mark for a single character). Without the narrow temporal filters, this granule ID filter will return all of the files from that day. See the example search results below with a narrow time filter:
- To download files, click the grey download icon for a single file, or use the green plus icons and Download All button for multiple files.
- To find geolocated waveforms and elevation data, switch to other LVIS products (LVISF1B, LVISF2, LVISC1B, or LVISC2).
